Saturday, October 18, 2014

Homemade Chicken Bouillon Powder

Some time ago, I set out to find substitutes for many of the mixes or ingredients I use in cooking, simply because so many labels are long lists of difficult-to-pronounce ingredients whose effect on the body is unclear.

One of those cooking ingredients I made pretty liberal use of was Wyler's Chicken Bouillon Granules.  I mean, I used this stuff *A LOT*.  And I used it in the homemade mixes I was making.  The biggest complaint I had about it for a long time was how salty it made stuff taste.  Then, one day, I looked at the ingredient list.  

Oh boy.  I can't take a picture of the label since I don't have a jar of this stuff anymore, but this is the ingredient list as taken from the Wal-Mart website:

Salt, Sugar, Corn Maltodextrin, Water, Hydrolyzed Corn Gluten Protein, Monosodium Glutamate, Chicken Fat, Onion Powder, Cooked Chicken Powder, Autolyzed Yeast Extract, Turmeric, Natural Chicken Flavor, Disodium Inosinate And Disodium Guanylate, Gelatin, Garlic Powder, Corn Syrup Solids, Natural Flavors, Celery Seed, Modified Corn Starch, Hydrolyzed Soy Gluten Protein, Partially Hydrogenated Soybean And Cottonseed Oils, Soybean Oil, Tricalcium Phosphate, Tbhq (Preservative), Artificial Flavor, Alpha Tocopherol (Antioxidant), BHA (Preservative), Propyl Gallate, Citric Acid, Butter Oil. Contains Soybeans, Milk. Processed On Equipment That Also Processes Wheat, Soybeans, Milk, Egg.

It's a list almost as long as my arm.  Plus, each teaspoon of the stuff has 740 mg of sodium.  No wonder it makes stuff taste so salty to us.

This item became a candidate for my ingredient substitution adventure and I quickly found a homemade recipe.  Now, like all good adventures, you really never know what's around the corner -- or, in this case, how something actually tastes. :)  But, this recipe is spot on!  I tried it out in our favorite Crockpot Black Bean Soup and not one soul in this family had any idea I'd changed anything.  The only comment I got was that it "needed salt".  

Mission accomplished!!

So, the recipe I use for my homemade chicken bouillon comes from a website called Mummy Deals.  You can print the recipe from her location.  I'm just going to show you my steps and pictures, but I pretty much followed the recipe word-for-word.

First up is the cast of characters.  You need nutritional yeast flakes, sea salt, minced dried onion, parsley flakes, sage, celery salt, garlic powder, thyme, marjoram, rosemary, and basil.  I had a difficult time finding the yeast flakes, and eventually located them at Earth Fare, an organic foods grocery store.  They were a tad pricey.

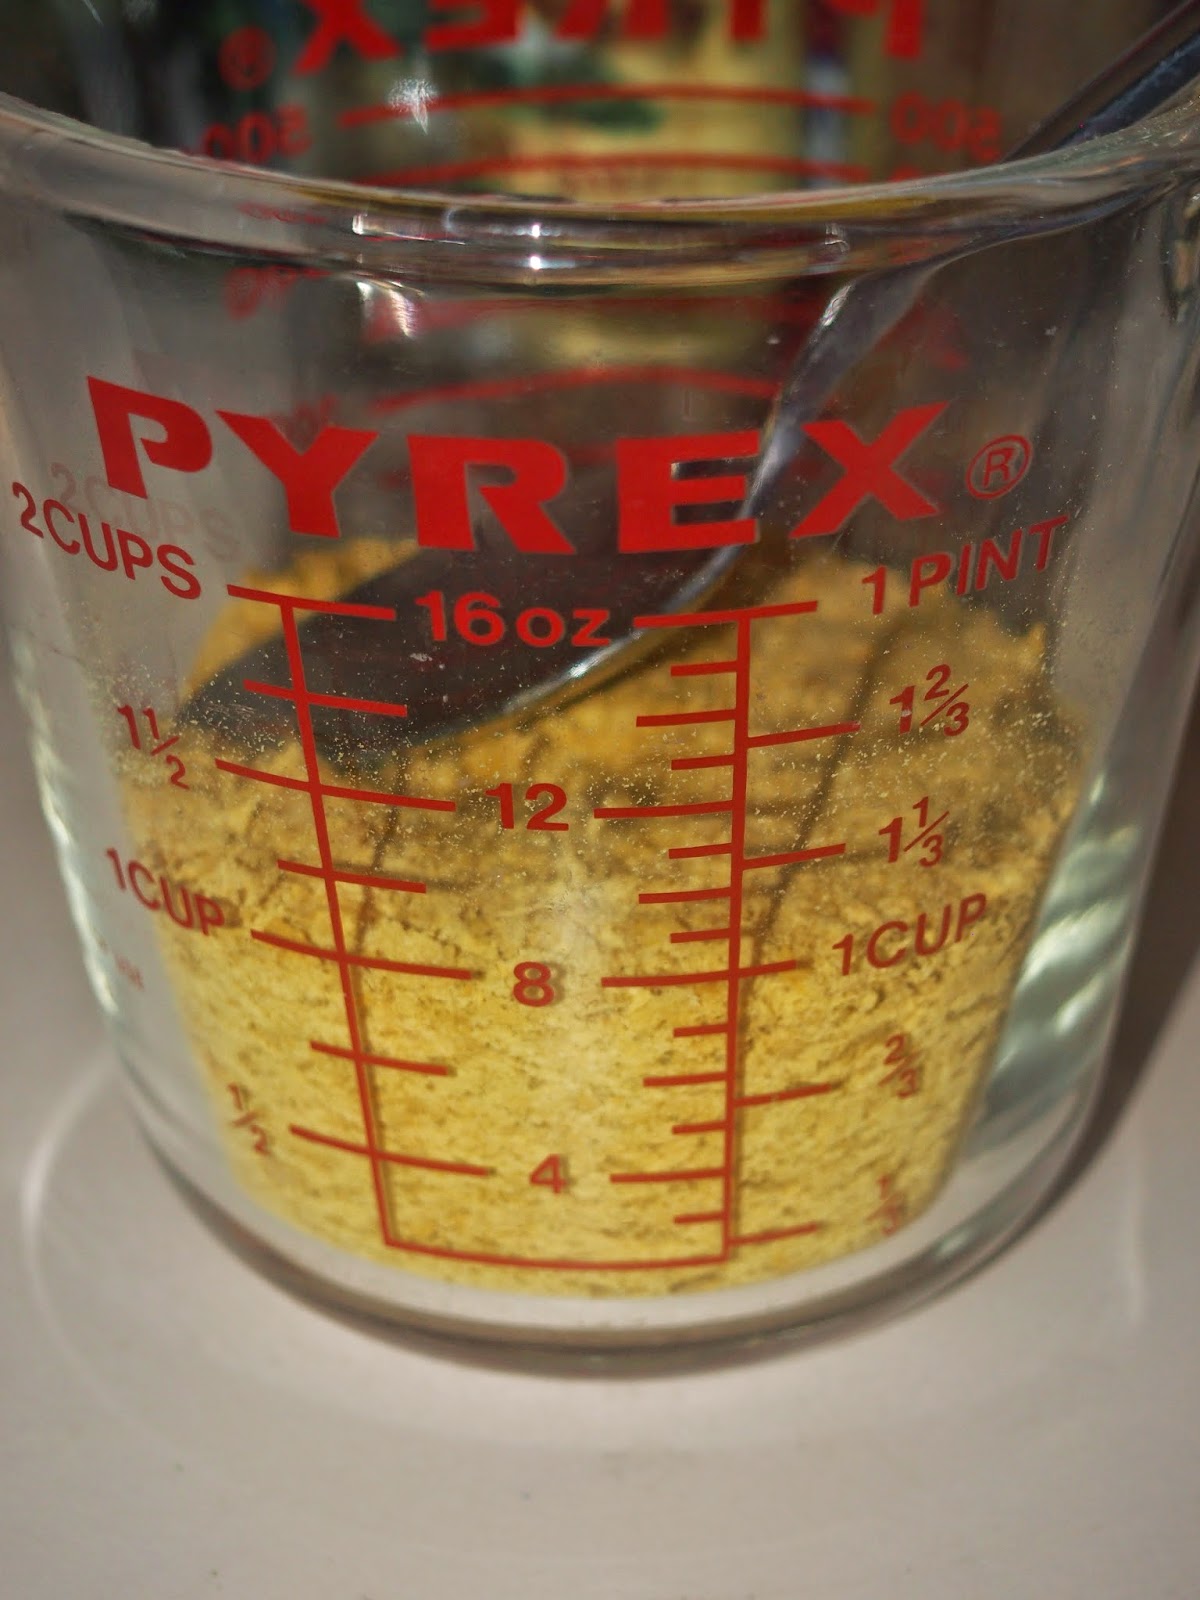
The recipe calls for 1 full cup of the flakes.  This was just under 1/2 the container.  I no longer have the receipt where I purchased the flakes, but I think I can safely say that I didn't necessarily save money on this recipe.  However, one glance at Amazon reveals that you can probably purchase the flakes in a larger package for a decent price.  That's what I'll do for future batches.

Apparently, you can also sprinkle the yeast flakes on popcorn to give it a good flavor.  I have a tad left in my container, so next time I make popcorn, I may give that a shot.  If that's the case, it'll at least have multiple uses.  :)

I poured all my spices in a bowl, just to make them pretty for a picture. No other purpose than that!

The ninja chopper I bought at Target is actually what I used to grind the ingredients.  Unfortunately, the ninja is not capable of getting these ingredients to a really fine powder.  The little onion bits were still quite visible in the mix, along with the parsley.  I have a coffee grinder somewhere I may try in the future, but I've had no trouble using this powder in this state.  

I simply store the powder in a small mason jar, and use 1 tsp per cup of water just like I do the old Wyler's stuff.  Now, I have not used this as pure broth.  I have used it in recipes, and other homemade mixes with great success.  It's not nearly as salty, so some adjustments need to be made for recipes that rely on some sodium.  For soups and what not, I just let each family member season as desired.  I don't like my food very salty anymore, so this fits my tastes pretty well.

Now, it wouldn't be fair to claim this is better without providing some information on Nutritional Yeast Flakes.  I don't have a picture of my container, but I thought I'd link you the information on Wikipedia and the nutritional database at Self Magazine.  

The short if it is -- nutritional yeast flakes are really quite good for you.  I bought a container of the fortified yeast flakes, so it had added B12 -- 130% of daily needs.

I can't really explain why this chicken bouillon powder successfully tastes like the chicken bouillon I've used for years, since no chicken is utilized.  But, it does.  And it's now become a staple of my pantry, ousting my old Wyler's jars.  I kinda wish I'd saved just one for storing this powder. 

I hope you enjoy this like we have!


Saturday, August 16, 2014

Crockpot Lasagna Soup

I found this wonderful little recipe this morning whilst perusing my Facebook feed.  It looked so simple to make, and I had all the ingredients, so I just had to try.  Good day for it too, since I'm sick. :(

All I can say is ... YUMMO!  We devoured the entire crockpot full of tomato-y goodness in short order.  Since I feel like I can give it a ringing endorsement, I thought I'd share it here!

The original recipe can be found on the Family Fresh Meals website.   I failed to take pictures, so this is tragically all text!  I'm not going to re-invent the wheel here, so I'll just share the changes I made to fit it into our family's typical food pantry items.  She didn't indicate crockpot size in the recipe, but I used a 6 1/2 quart crockpot, and it was a touch over half-full at the end.  Probably not the most efficient size for this recipe.

She calls for a pound of ground beef, uncooked.  Instead, I used a pound of ground chicken, and I browned it in a skilled with 2 tsp dried minced onion plus 1 tsp dried minced garlic.  I don't like to toss uncooked ground meat in a crockpot.  Just a quirk.  Just me.  YMMV  

My husband declared that I'd used too much onion just using the old sniff test, so I will reduce that next time.  I "made his eyes water", lol!  Oddly enough, I didn't notice the onion, but hey -- he's the guy I please so the onion will get the ax on the next go. :D

Since we don't buy V8, I replaced the cup called for in the recipe with 1/2 cup water plus 1/2 cup tomato sauce following extensive research on the internet (lol, extensive -- I nabbed the first substitute recipe I ran across. :P).  I'm not sure what the V8 would have added for flavor and sodium, but we really didn't miss it.

For beef broth, I brought three cups of water to a boil in the skillet where I'd cooked the chicken so I could get the yummy bits off the bottom of the skillet.  I added beef bouillon granules to the boiling water and stirred until dissolved.  I then poured that into the crockpot with everything else.  At the end, the recipe "seemed" a touch too salty, so I may cut this back to 2 tsp of granules next time or find a homemade beef bouillon granules recipe. 

It cooked from 11:30 am to 6:30 pm and smelled wonderful.  It really did smell like lasagna.  The pasta was perfectly done at the 30 minute mark as well.  It's not soupy-soup.  It's more like hearty-soup.  We had rolls and green beans on the side.  Perfection!  Would be great too when it's cold outside, maybe even better then!

It is definitely a keeper!  I've already added it to my Mastercook program.  So, using the changes I made, here are the nutrition numbers from Mastercook.  I'm not sure how Mastercook handles some of the ingredients, and my copy of the software is older than the dinosaurs, so these would be guidelines.   In other words, take 'em with a grain of salt!  But not too much salt... it's not good for you.  :P

Servings: 6
Calories: 332
Total fat: 8g (Saturated fat: 2g)
Sodium: 480mg
Protein: 29g
 
Enjoy!

Monday, June 9, 2014

Homemade Taco Seasoning

Update 6/10/14: I put a wrong amount on the recipe!  It's been updated.  :)  Sorry for that!

I thought I'd start sharing a few of the made-from-scratch recipes I use for cooking and cleaning around the house.  Today, I'm sharing my oldest recipe -- Homemade Taco Seasoning!  

Years ago, we'd have tacos every week.  We loved them!  Back then, I used the Ortega sauce mix, which you could buy in a small packet.  Then one day I noticed that it wasn't on the shelf anymore.  It soon turned out I couldn't find it anywhere.  We tried the other mixes, but no one like them.  

So, off to the internet!  I found this great Taco Seasoning recipe on the AllRecipes website.  What did I have to lose?  We gave it a try.  And, initially, we didn't really like it.  At that point, I simply gave up and we didn't have tacos for quite a long time.  One day, I ran across the little jar of mix I'd made, thought "huh, why not", and tried again.

We've been using it ever since.  I'm not sure if time made us forgetful of the original deliciousness of Ortega, or if I did something different.  At any rate, I've been using this same recipe since that time.

Now, I made a few changes to the original recipe from AllRecipes.  I increased the amount of cayenne pepper because my family wanted some "kick" in the flavor.  I also quadrupled the recipe so that it made enough to nearly fill a quart-sized canning jar.  That way, I don't have to mix it so often.  And finally, I actually add more seasoning per pound of meat than what the original recipe recommends.  These were tweaks that make the recipe taste good to us. 

So, first off, gather all your spices.  I buy mine in the monstrous containers from our local Sam's Club. I'm sure they can be found in other places as well.  Since I started making so many things from scratch, these large spice boxes have come in quite handy.

Now, for pretty sake, I poured the spices in little piles on a piece of wax paper just to take a picture.  From top left, going clockwise, I have chili powder, onion powder, cornstarch, cayenne pepper, garlic powder, paprika, and cumin in the middle.  Cumin is great for Mexican-style dishes too, so we use quite a lot.  I have a fantastic black bean soup recipe I'll have to share one day.  :D

Anyways, toss all that lovely goodness into a bowl and mix it up.  I use a little whisk, but a spoon is good too.  For some odd reason my paprika had lumps, so I pinched them up after whisking.  I use paprika a lot on chicken and fish, so probably just too much moisture on my part. 

After it's good and mixed, I add it to my mason jar.  Now, if you have a large enough jar, you could probably just pour it in, hand it to a child, and say "shake it", and you'd be good to go.  I am not confident there's enough room in the mason jar to mix it well, so I mess up a bowl first. :)  

Once the jar is full, place it on the shelf and admire its pretty color, hehe.  We really do enjoy this mix.  I hope you enjoy it too!

What I love most about this particular recipe is that there are no strange, unpronounceable ingredients in the mix.  These strange ingredients from another planet is a large part of why I've been working hard to eliminate the boxed mixes (albeit quite slowly!).  So, it's a small thing, but it feels good to know that every ingredient is something I can both spell and pronounce. :) 

Side Note: Now, as a first time taste test, it might be most prudent to simply try the linked original recipe as it makes far less than my modified recipe.  That way, you don't make a monstrous investment in spices just to be disappointed. 

Homemade Taco Seasoning Mix
Printable Recipe 

8 tablespoons chili powder 
7 tablespoons paprika
6 tablespoons cumin 
3 tablespoons onion powder 
3 tablespoons garlic powder 
2 tablespoons cornstarch 
1 teaspoon cayenne pepper

Mix all ingredients together in a large bowl, then transfer to a glass jar.  This amount of mix will fit inside a quart-sized canning jar.  Shake or stir before each use. 

To Use:
Brown meat in a large skillet.  Add 8 teaspoons (or 2 tablespoons plus 2 teaspoons) of mix for each pound of meat cooked.  Then add approximately 1/2 to 3/4 cup water per pound of meat.  Bring to a boil, cover, then allow meat to simmer for 10 to 15 minutes.  In last 5 or so minutes, remove lid to encourage liquid to cook away; you may need to raise the temperature in order to quicken this process.


Serve with favorite taco additions.


Thursday, May 8, 2014

Crochet-A-Long!

Now, don't get the wrong idea.  I'm new to this blogging adventure, so I'm going the safe route -- I'm blogging about the stuff I do that other folks think up! :)  Maybe in a month, I'll have something uniquely "me" to post, haha.  

So, I had heard of Crochet-A-Longs (CAL) before, but just never tried them.  Not sure if I was afraid or lazy, but I let them go by on my Facebook feed without a thought.

Then, one caught my eye.  At the end, I'd have *24* 12" blocks if I stayed true to the program!  Now that's a nice, big blanket!  I like the idea of something that's more than eye-candy.  I like things that serve purpose too.  To make matters even better, I already had some yarn I could use for my mom (see the Mandala).  The website promised that the blocks wouldn't take long, so I decided to make two of these afghans.

The CAL I bravely chose is conducted by the Moogly website.  They are on block #9 now, so I am starting my sharing a bit late.  But, like tea, waiting a little just makes it that much better!  

P.S.  Sweet tea is wonderful stuff!

So, the Moogly CAL began with a rather neat first block call Anticipation.  If you visit the Ravelry website using the link in the block name, you will see lots of examples of this block in tons of lovely color combinations.  It's also a free download, another great bonus!


The sample block is very pretty.  So, I set out to make the block for my  mom using the sunflower colors I chose long ago.  I very carefully planned out colors so that it'd not be the strangest block ever seen, and started the block.  I got lost on the surface crochet (which is white in the above picture), but the author graciously provided a picture tutorial which got me past my brain freeze.

After I made one block in my sunflower colors, I made a second block in a different color pathway.  This one, I decided to not plan in advance and just kinda did what "felt good".  It still turned out okay!  I think I made it 2 or 3 weeks later, when I finally decided I really could do two of these afghans.  Originally, this block was trying enough that I thought maybe that would be too much.  But I gained some confidence and mushed on with two different color pathways.  

So, I introduce the Anticipation block as Sunflower Parade (left below) and Go Team! (right below)


Hrm, still not sure why my block are so far apart, haha.  I really like how different they are.  You can tell they are the same block, but one looks almost like a negative of the other.  It's awesome.

I do have to admit that I'm not a big fan of the surface crochet.  It made the squares tricky to block to the full 12 inches, but now that I'm looking back I'm okay with them.  

Just for reference, the Sunflower Parade color pathway is made using Caron One Pound yarn in Soft Sage, Sunflower, Expresso, and another green whose sleeve I've lost.  ._.  The Go Team color pathway uses Caron One Pound in Midnight Blue and White.  The orange is actually Carrot by Red Heart Super Saver.

I bravely bought two more color pathways, but I've since decided to do something else with them.  One is a clearance buy from Joann's Fabrics that I didn't realize was cotton instead of acrylic!  I want to do something really special with that yarn, but no idea what yet.  The other color pathway is busy in a work-in-progress that may be with me until I die!  LOL  Maybe I can finish it just to have something to post. :D

Anyway, I think this CAL is turning out to be really fun.  It may not be ideal for a brand new crocheter as some of the blocks do have some challenging stitches, but who knows?!  You may rock it anyway.

I hope this inspires you!  God bless you and enjoy! :)

Many blessings,
Kimberly

Proverbs 31:13  New American Standard Bible (NASB)
13 She looks for wool and flax
And works with her hands in delight.

Tuesday, May 6, 2014

DIY Fruit Tray

Back in February, on impulse, I bought a copy of Woman's Day magazine.  The little green circle on the front screamed "Only $2.79" which fits better in my ever-tightening budget than the $6.99 and $7.99 of other magazines.  Inside was an article entitled "So-Simple Tiered Tray".  The minute I saw it, I thought of how nice it would be to make and clean up the counter where I keep multiple bowls of fruit.

Now, I didn't care much for the rustic look of the metal trays she used, so I set out to find some stuff at the Dollar Tree.  I did find the candlesticks there, but I couldn't find any graduated sized plates that weren't glass.  Since I still have young children *and* I'm a touch clumsy, I decided glass would be a bad idea.  

<shudders at the thought of bajillions of glass shards skittering across the tile in the kitchen>

After a bit more searching, I found some plates in Big Lots for $1.50 each, in various sizes.  I decided a bowl on top would be nice to corral smaller fruits.  I liked the look of the candlesticks unpainted, so I went wild and made my own tiered tray.

I'm pretty happy with it!  At left is the tray empty, and right is with fruit.  I especially love the little kiwi on top that looks like it's standing up!  Haha.  But, one big problem emerged. This tray is simply not big enough for the amount of fruit we consume.  As you can see, there's no room for apples. :( 

So, off to the store again and this time I decided to show my steps.  I did things a little differently than the article's writer.  Mainly because I didn't really want to use the Gorilla Glue!  My hubby had a hard time getting the cap off when he needed.  No way was I getting the cap off without his help.

So, here's my take on it.  

Resources:
3 graduated size trays (plates, bowls, platters, cake pans, etc.)
2 candlesticks, any size or shape
E6000 glue
Patience :D


Pardon the picture layout.  I'm not sure what Blogspot is doing.  ._.  These pictures must've been naughty because they are each in their own corner. :P

I learned the hard way from my first tray that the best thing to do when using E6000 is to give it 24 hours to sit.  I moved my first tray a few hours later and it just came apart.  So, this is a multi-day process for me.  If you have good luck with E6000 in shorter time frames, go for it!  Humidity down here in the south may simply extend drying times.

So, after eye-balling the trays and candlesticks for a while, I decided I wanted them upside down like on my first tray.  They look a little less like candlesticks to me and was pleasing to my eye.  Do a dry run with your candlesticks and trays to see what you like.  After I made my decision, I glued the candlesticks to the bottom of each smaller tray first.

The picture at the right shows the E6000 a bit gooped up on the edge, but that's because I was trying to squeeze that tube and take a picture at the same time!  When you smash the glued side down onto the plate, it seems to even out, and isn't terribly noticeable (see picture on left).  My other edges were much cleaner.  I simply eye-balled the centers, so mine are a touch off, but you could mark yours with light pencil marks if you prefer something even. 

Anyway, I let that sit, candlestick side up, for 24 hours.  I then glued the middle sized tray to the bottom tray, roughly eye-balling the center of the big tray.  Luckily, the big tray had an ever-so-slight indention in the middle, so I used that as best I could.  Again, I let that sit for 24 hours.  Actually, I completely forgot about it and it sat for 3 days. 

I finally added the smallest top tray.  No indention to help this time, though.  I also decided to take a picture of where the pieces are glued together.  As you can see, the glue is clear, so it's very hard to see if you gooped it up, or did it perfectly.  

There are probably prettier candlesticks out there for a project like this, though they may be more than the $1 I paid to get mine.  The trays were bought at Winn Dixie in their seasonal section.  I think I paid $6.99 for the big tray, and $3.99 for each smaller tray.  It's likely too seasonal-looking to keep out year round.  What I'll probably do is keep an eye on Hobby Lobby and when they clearance out after seasons end, I'll get more then.  

Or, I'll get a burr in my saddle and go buy them on the 50% off sale with my 40% off coupon!  Who knows?  Maybe the thrift stores will finally have something I can use.  


I'm happy with it anyway, and both trays side-by-side hold way more fruit and take up way less space than the army of bowls I was using before.  I don't have pictures, but they are currently holding bananas, apples, and avacadoes. And since it's almost summer, they feel very "current".  

I hope you are inspired to try this yourself!